Morrowind Mod Management
Introduction
Managing mods in Morrowind, often by the hundred and many of them conflicting, is no easy feat; they need to be installed in one order and loaded in a completely different order, and they may also require cleaning or merging.
Fortunately, much of this can be handled by external programs. I won't go into too much depth about each program since they all come with their own documentation, but I will try to provide a quick guide on how to manage mods, and why each program is necessary.
What Is a Mod?
Mods come in all shapes and sizes, but broadly there are 2 categories:
Plugins
All the game data for Morrowind - the world, quests, NPCs, items, etc. - is defined in a file called Morrowind.esm. Plugin files (.esp) can alter this data, for example, changing the stats of a weapon, adding a new quest, or rearranging a town. Plugins belong in the Morrowind/Data Files directory, and must be enabled in the Morrowind Launcher before they become active.
Assets
All of the Morrowind assets (models, textures, icons, etc.) are packed up in a file called Morrowind.bsa. However, when Morrowind tries to load one of these assets, it first looks for it in the "Data Files" directory. This makes it very easy to supply our own assets, which is what many mods do. Mods that replace vanilla assets without the need for a plugin are called "pluginless replacers".
Installing Mods
Wrye Mash
Wrye Mash is a mod manager, used primarily for installing and uninstalling mods. It takes a bit of time to learn, but I highly recommend it if you plan to use more than a handful of mods. It knows which files are associated with which mods, so you can easily uninstall a mod without leaving unwanted files behind.
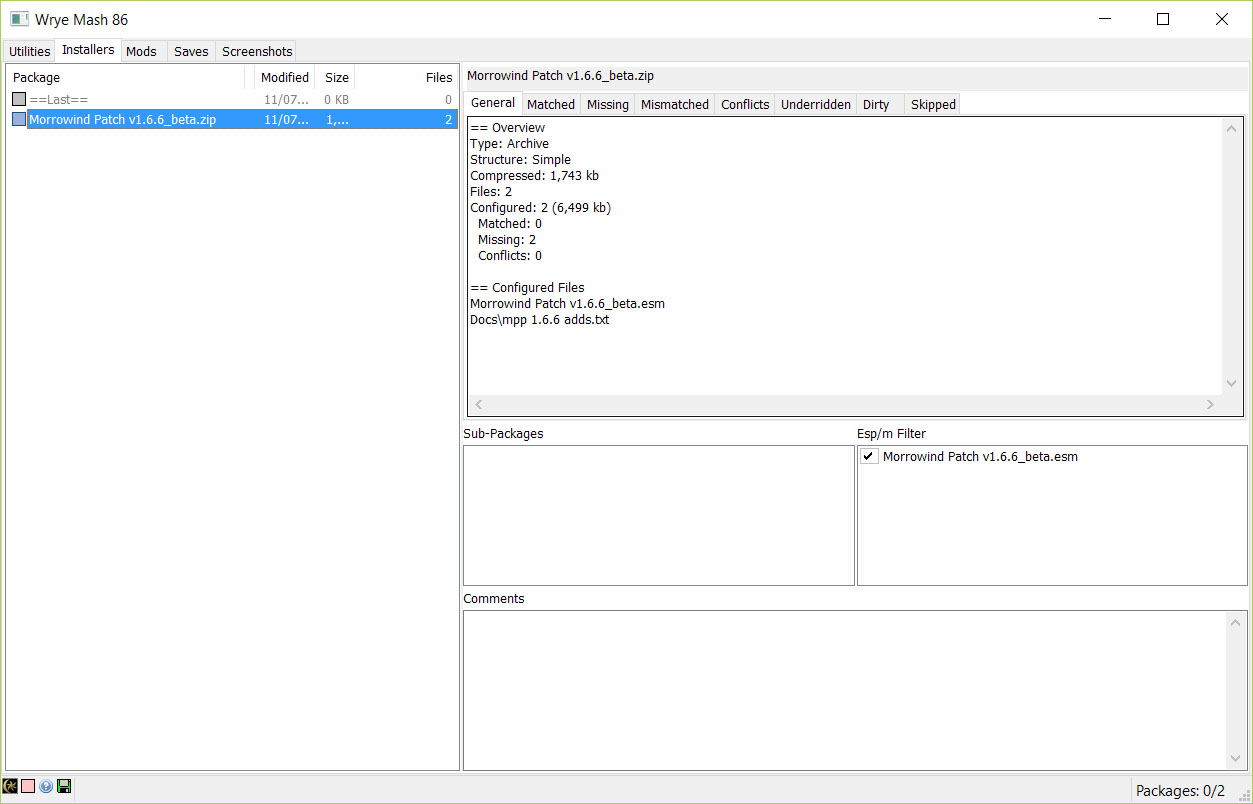
Installing a Mod
Downloaded mods should be placed directly into Morrowind/Installers. There is no need to extract the files after downloading, as Wrye Mash can support most common archive formats. When you run Wrye Mash (Morrowind/Mopy/mash.exe), all your mods will appear in the "Installers" tab. To install a mod, simply right-click on it and press "Install Last".
If a mod includes a plugin (.esp) file, it must be checked in the Morrowind Launcher or the "Mods" tab of Wrye Mash in order for the game to load it.
Special Cases
Rarely, mods will provide a BSA file instead of individual models / textures, etc. This is an archive file containing lots of resources packed together. In order for the game to load it, it must be added to the [Archives] section of Morrowind.ini.
Some mods, particularly mods that affect lighting or skies, may also require changes to Morrowind.ini. Be sure to backup this file before making any changes.
Resolving Problems
Installing mods is only the beginning.
Often installed mods can conflict with each other, or mods can contain unintended changes which can lead to subtle bugs. To solve these problems, the following steps should be taken - in the order listed - any time new mods are installed.
Changing the Install Order
If 2 mods edit the same file, such as a model or texture, whichever mod is installed last will take precedence. Conflicting mods in Wrye Mash will turn yellow.
To change the install order:
- Right-click on a mod in the "Installers" tab of Wrye Mash and press "Move To…"
- Right-click on the later mod and press "Install" again in order to reinstate any files which were previously overwritten. Right-clicking a mod and pressing "Anneal" will also fix most issues.
Cleaning Mods
Some mods are accidentally released in a "dirty" state, which can cause problems during gameplay. Fortunately, there are lots of tools out there for cleaning mods. Any dirty mods should always be cleaned before they are used.
Example
On Windows, tescmd can be used to clean all mods by running this batch file from your Morrowind\Data Files directory:
@echo off
tes3cmd.exe clean --overwrite --hide-backups "*.es[mp]" > clean-all.log
type clean-all.log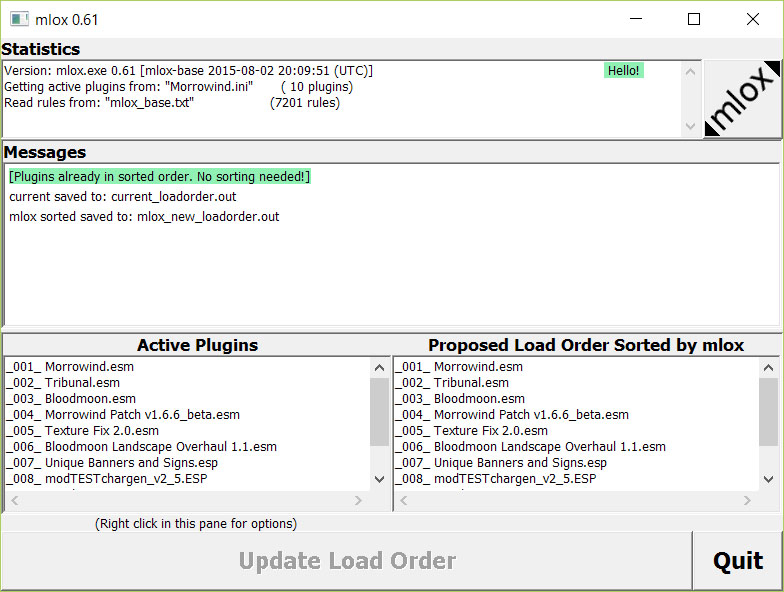
pauseSorting Mods
If 2 mods modify the same data, whichever loads last will take precedence.
mlox is an analysis tool that uses an extensive rule database to sort mods in the best possible order. It can also point out potential problems, such as conflicts between mods.
Merging Objects
It is possible that 2 mods edit the same object in different - but compatible - ways. For example, Mod A might change the price of a Daedric Dagger, while Mod B might change its damage.
TES3Merge can combine these changes by creating a third mod (Merged Objects.esp) that replicates the changes from Mod A and Mod B. In fact, it can perform this operation for an entire list of mods.
Merging Leveled Lists
Similarly to merging objects, changes to Leveled Lists from multiple mods should be merged, otherwise whichever mod loads last will take precedence in the case of a conflict.
tes3cmd can do this for us, with the help of another batch file:
@echo off
tes3cmd.exe multipatch > multipatch.log
type multipatch.log
pause
This also fixes a number of other obscure bugs that can arise.
Checklist
So, you think you might finally be ready to play Morrowind?
Let's double check the steps:
- Download desired mods
- Install mods (Wrye Mash)
- Configure install order of any conflicting mods to set precedence
- Add any BSA files to Morrowind.ini
- Tweak Morrowind.ini for any mods that require it
- Clean dirty mods (tes3cmd)
- Activate desired plugin files
- Sort mods and resolve warnings (mlox)
- Merge objects, excluding multipatch.esp (TES3Merge)
- Merge leveled lists (tes3cmd)
If you've done all this, you're ready to play!
Published 2016/07/12
Last updated 2022/04/18